
Picking Fruit
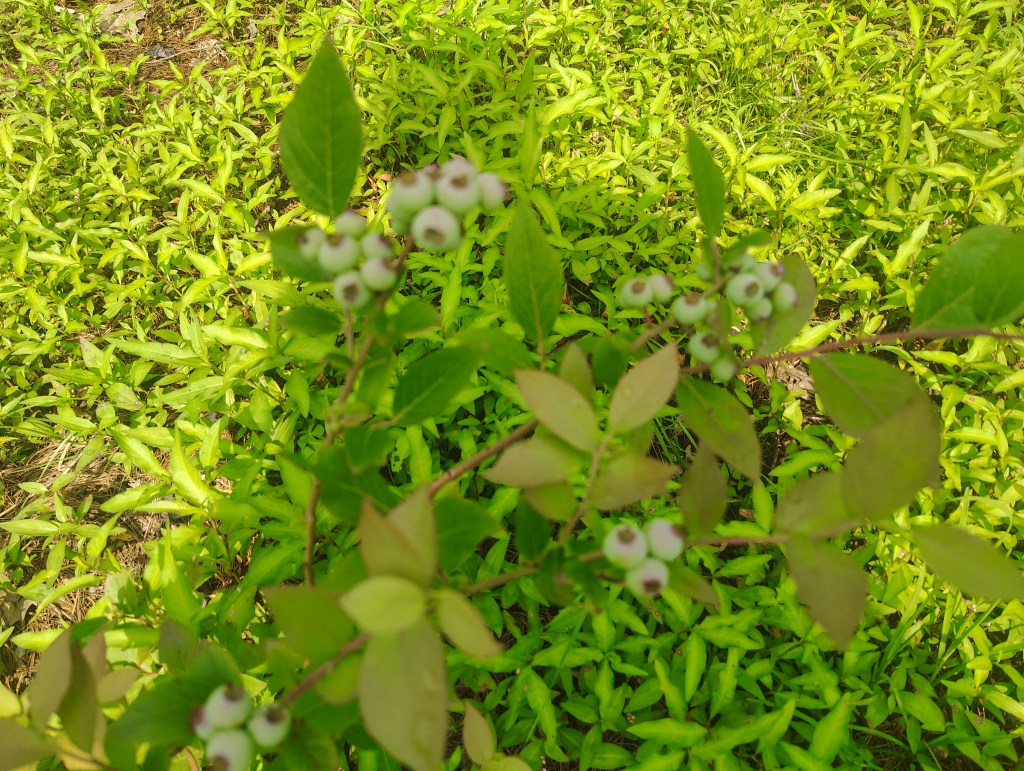
Everybody likes blueberries, or at least that’s my theory. When considering what types of produce to make available for future u-pickers on the farm, I knew I wanted at least one kind of fruit. A few fruit crops had been tried here in the past: strawberries, which have to be replanted at regular intervals; apple trees, which always seemed to struggle, and blueberries. We have a set of twelve blueberry bushes, which were planted near the road 10-15 years ago, at a time when most of the property was wooded.
The spot my parents selected back then was open, flat, and it was… open. To this day, the ground there looks like it might be the most unhospitable corner of the farm. There is little topsoil, and the ground is hard, rocky—even the weeds grow sparsely. However, when my parents were planting it was the only place available, so they added some soil amendments and hoped for the best. They didn’t fertilize the bushes. In fact, they didn’t do much of any maintenance after planting. Today? The bushes are full-grown and thriving. Every spring, they turn a vibrant shade of green, and most summers they yield a boatload of berries.
The moral of the story is that blueberry bushes can be hardy, and they apparently grow here. It’s also worth noting that those bushes were originally sourced from a u-pick farm just a few towns away, which is still successfully operating today. All of this gave me confidence that I could A, grow new bushes on the farm, and B, use people’s sweet teeth to con them into paying for the resulting berries!
Location, Location
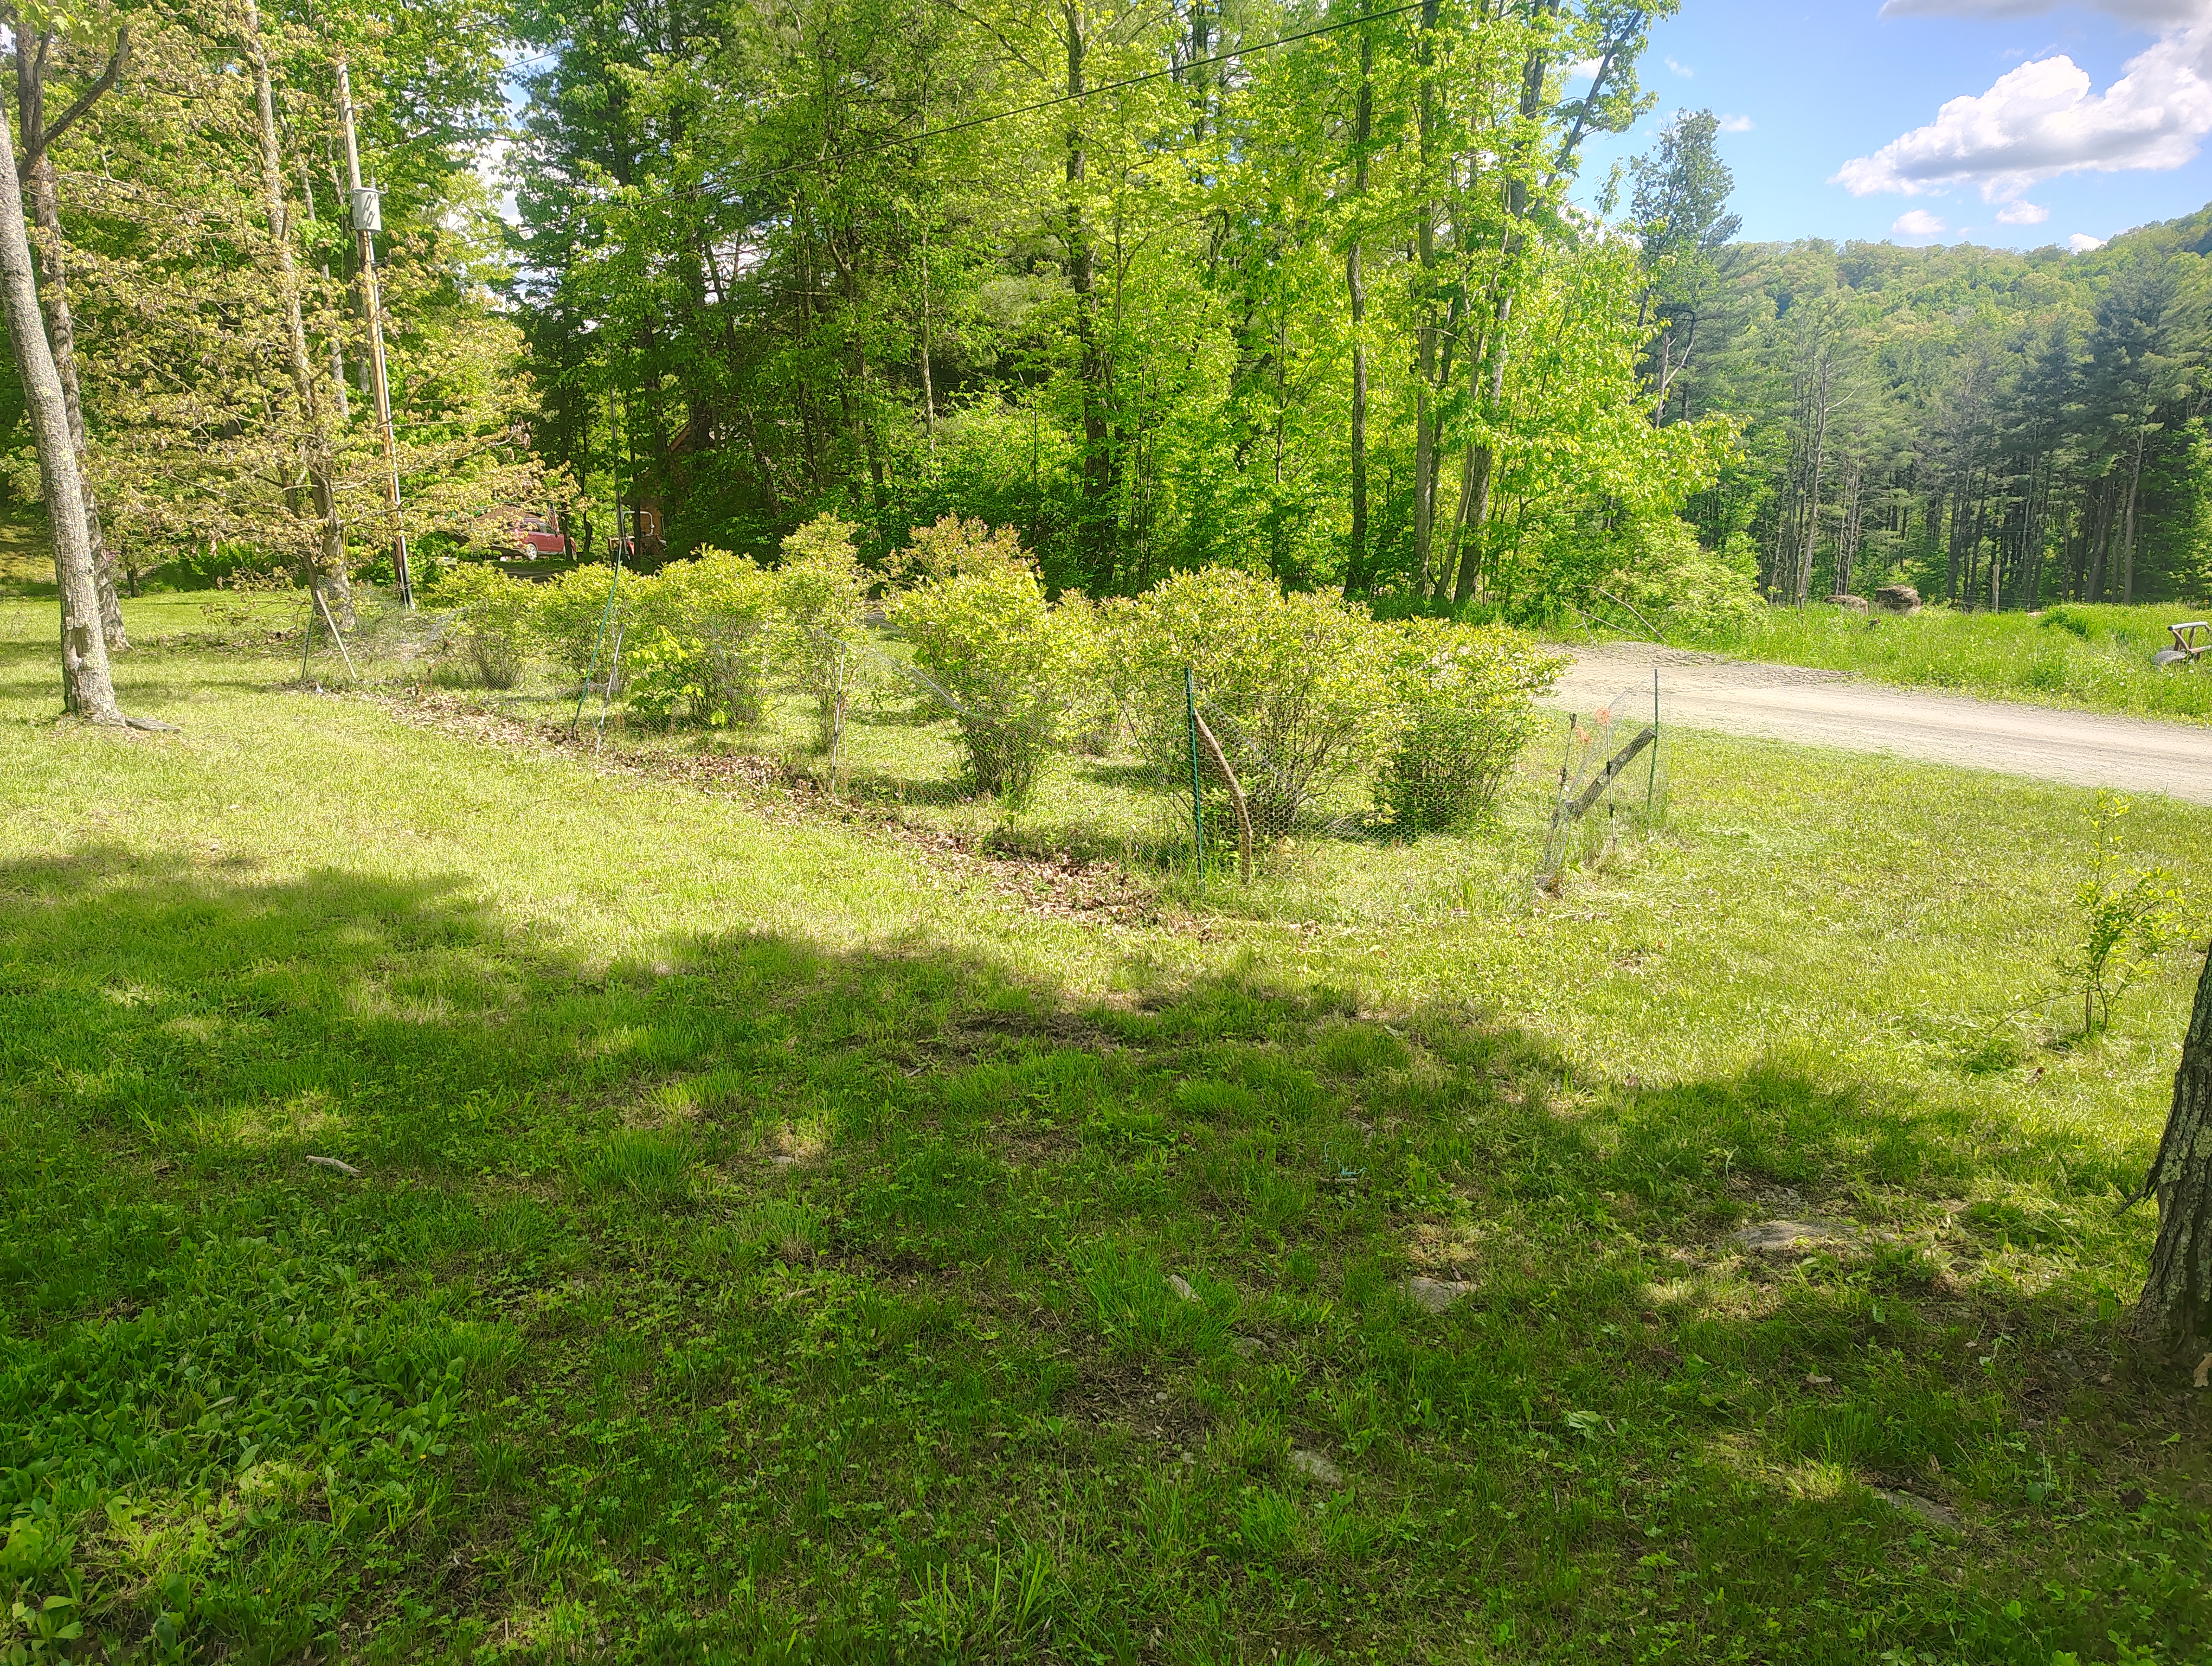
Once I settled on blueberries for my foray into fruit, the first order of business was to select a planting site. We had two dormant fields behind our house, each around a quarter acre, which had seen little use in recent years. The lower of the two fields had been the site of my first pumpkin patch in 2024 and had proved to be very wet, even during dry spells.
The upper field had the opposite problem. It could get wet after a heavy rain, like any spot, but it tended to quickly dry out if the sun showed its face for a day or two. Which was the bigger potential problem for my fledgling bushes? Droughts in the summer, or floods in the spring and fall? I scrounged the relevant online forums and Facebook posts to find out that, drumroll… both are bad. Real helpful, I know. For a time, I put the decision off. I mulled it over during several walks between the fields, while driving from place to place, and during daydreaming sessions at work.
Blueberry, or Blueberry?
In the meantime, I reached out to the current owner of Hilltop Berry Farm in New Milford, PA, the same place my parents got those first bushes years ago. The owner, Dave (son of the guy my parents dealt with), told me that they no longer grow their own bushes for sale. However, he regularly makes trips to some larger nurseries to pick up bulk loads of young bushes. Then he resells the bushes locally to anyone who wants them, like me. It was obvious that Dave had grown up with blueberries, and he turned out to be a wealth of knowledge. I was given a wide array of species to choose from, along with a thorough debriefing on the pros, cons, and characteristics of each one.
There were several factors to consider when choosing the type or types of bushes I would plant. For starters, the cold that comes every winter, at times aided by wind chill, can be a challenge for any sort of year-round crop. All the options I had were fairly cold-hardy, but some, such as bluecrop, were advertised as being resistant to damage from temperatures as low as -30. Another important point was the production window for the berries. Most bushes produce somewhere in the range of June-August, but this is not the rule. Chanticleer bushes can produce as early as May, and Auroras give berries as late as September. In the long run, I wanted to have a variety of bushes that could provide a full production range from May to September.
As always, budget was another consideration. The more bushes I ordered, the better the rate I would receive. On the other hand, I was hesitant to put in a huge order in case things went awry in the first growing year and the bushes didn’t survive. Ultimately, I settled on 50 bushes as a good starting point that wouldn’t break the bank or risk a major loss. For variety, I settled on an even split between Bluecrop, picked for their cold hardiness, and Chandlers, picked for their trademark quarter-sized berries. Both of these were mid-season varieties; I figured I would branch out to other types in the future. I put my order in with Dave in early Spring, with a target delivery date in April.
Digging a Hole Can’t Be That Hard… Right?
That gave me a month or so to get prepared. Wherever the bushes ended up, planting them meant digging a hole for each one at least as deep as the root ball and twice as wide. One could dig the holes by hand—in Florida. The ground here is five or six inches of real topsoil, followed by clay, all of it peppered with our most reliable crop—rocks. Considering that I couldn’t spend all summer digging, some mechanical assistance was required. As far as one could tell, there were two potential options: one, dig the hole with a backhoe or excavator, or two, drill the hole with an auger. A used backhoe or excavator might run several grand, and that’s for a well-loved unit. A machine could be rented in theory, but that isn’t inexpensive either, and it would have to be done for each future planting.
Powered augers come in many forms, including handheld motorized types, skidsteer attachment style, and those made for a 3-point hitch. A 3 point-hitch, of course, is the style of attachment hookup found on the back of all modern tractors. It seems just about anything can be found in a 3-point hitch variation, and that includes post hole diggers. Brand new, one of these attachments could be had for around $500-$600, but that included no bits. The bits themselves could be just as pricey. So I turned to my old friend, Facebook Marketplace. Several reasonably priced diggers could be found nearby, but most came with bits in the size range of 6-10.” I was looking for something bigger, something that could knock out each required hole in one shot.

Finally, I found the needle in a haystack, an older post-hole digger with a 10″ bit and a 24″ bit. The bundle was priced around the same as all the other diggers I’d seen, which was enticing considering that a 24″ bit alone could run you $500 new. The only catch was that the seller was up in New York State, about an hour and a half drive away. So, my Dad and I made the pilgrimage up there a day or two later. As it turned out, the address we had led us to an RV dealership. The guy selling the digger worked there, and as a perk, they let him store some of his personal equipment in one of their buildings. Neat. The digger had been stored outside and was wearing a coat of snow, but it seemed to turn freely.
The seller was plenty friendly, and we ended up hanging out for a little while, swapping stories. The fun part of buying stuff on Marketplace is all the characters you encounter. This guy showed us all his toys, including a brand new F-350 Platinum, which was nice but too rich for my blood. Dad told the familiar story of his old ’73 Gran Torino with a 351 Cobra Jet; it’s a staple of our Marketplace meets. The digger and bits were all strapped down to a pallet, and the seller had a forklift ready to go, so loading was a quick process. Once we finally got done talking, we hit the road and headed home.
Back on the farm, we hooked up the digger and took it for a spin, no pun intended. The digger turned nice and quiet when hooked up to the PTO on our New Holland. I double-checked the oil in the gearbox, wire brushed and painted the digger, and we were almost ready to go. But, and there’s always a but, there was a complication. The digger came with the 10″ bit installed, and we had to swap it with the larger bit. There was one pin and one bolt holding the current bit to the shaft on the gearbox. In theory, you remove both of those, and the bit should fall off. It did not fall off. We hammered, we pried, we insulted its mother, but the bit wouldn’t budge. No amount of penetrating oil could persuade the thing to move. We even tried augering a couple of holes with all the pins removed, no luck.
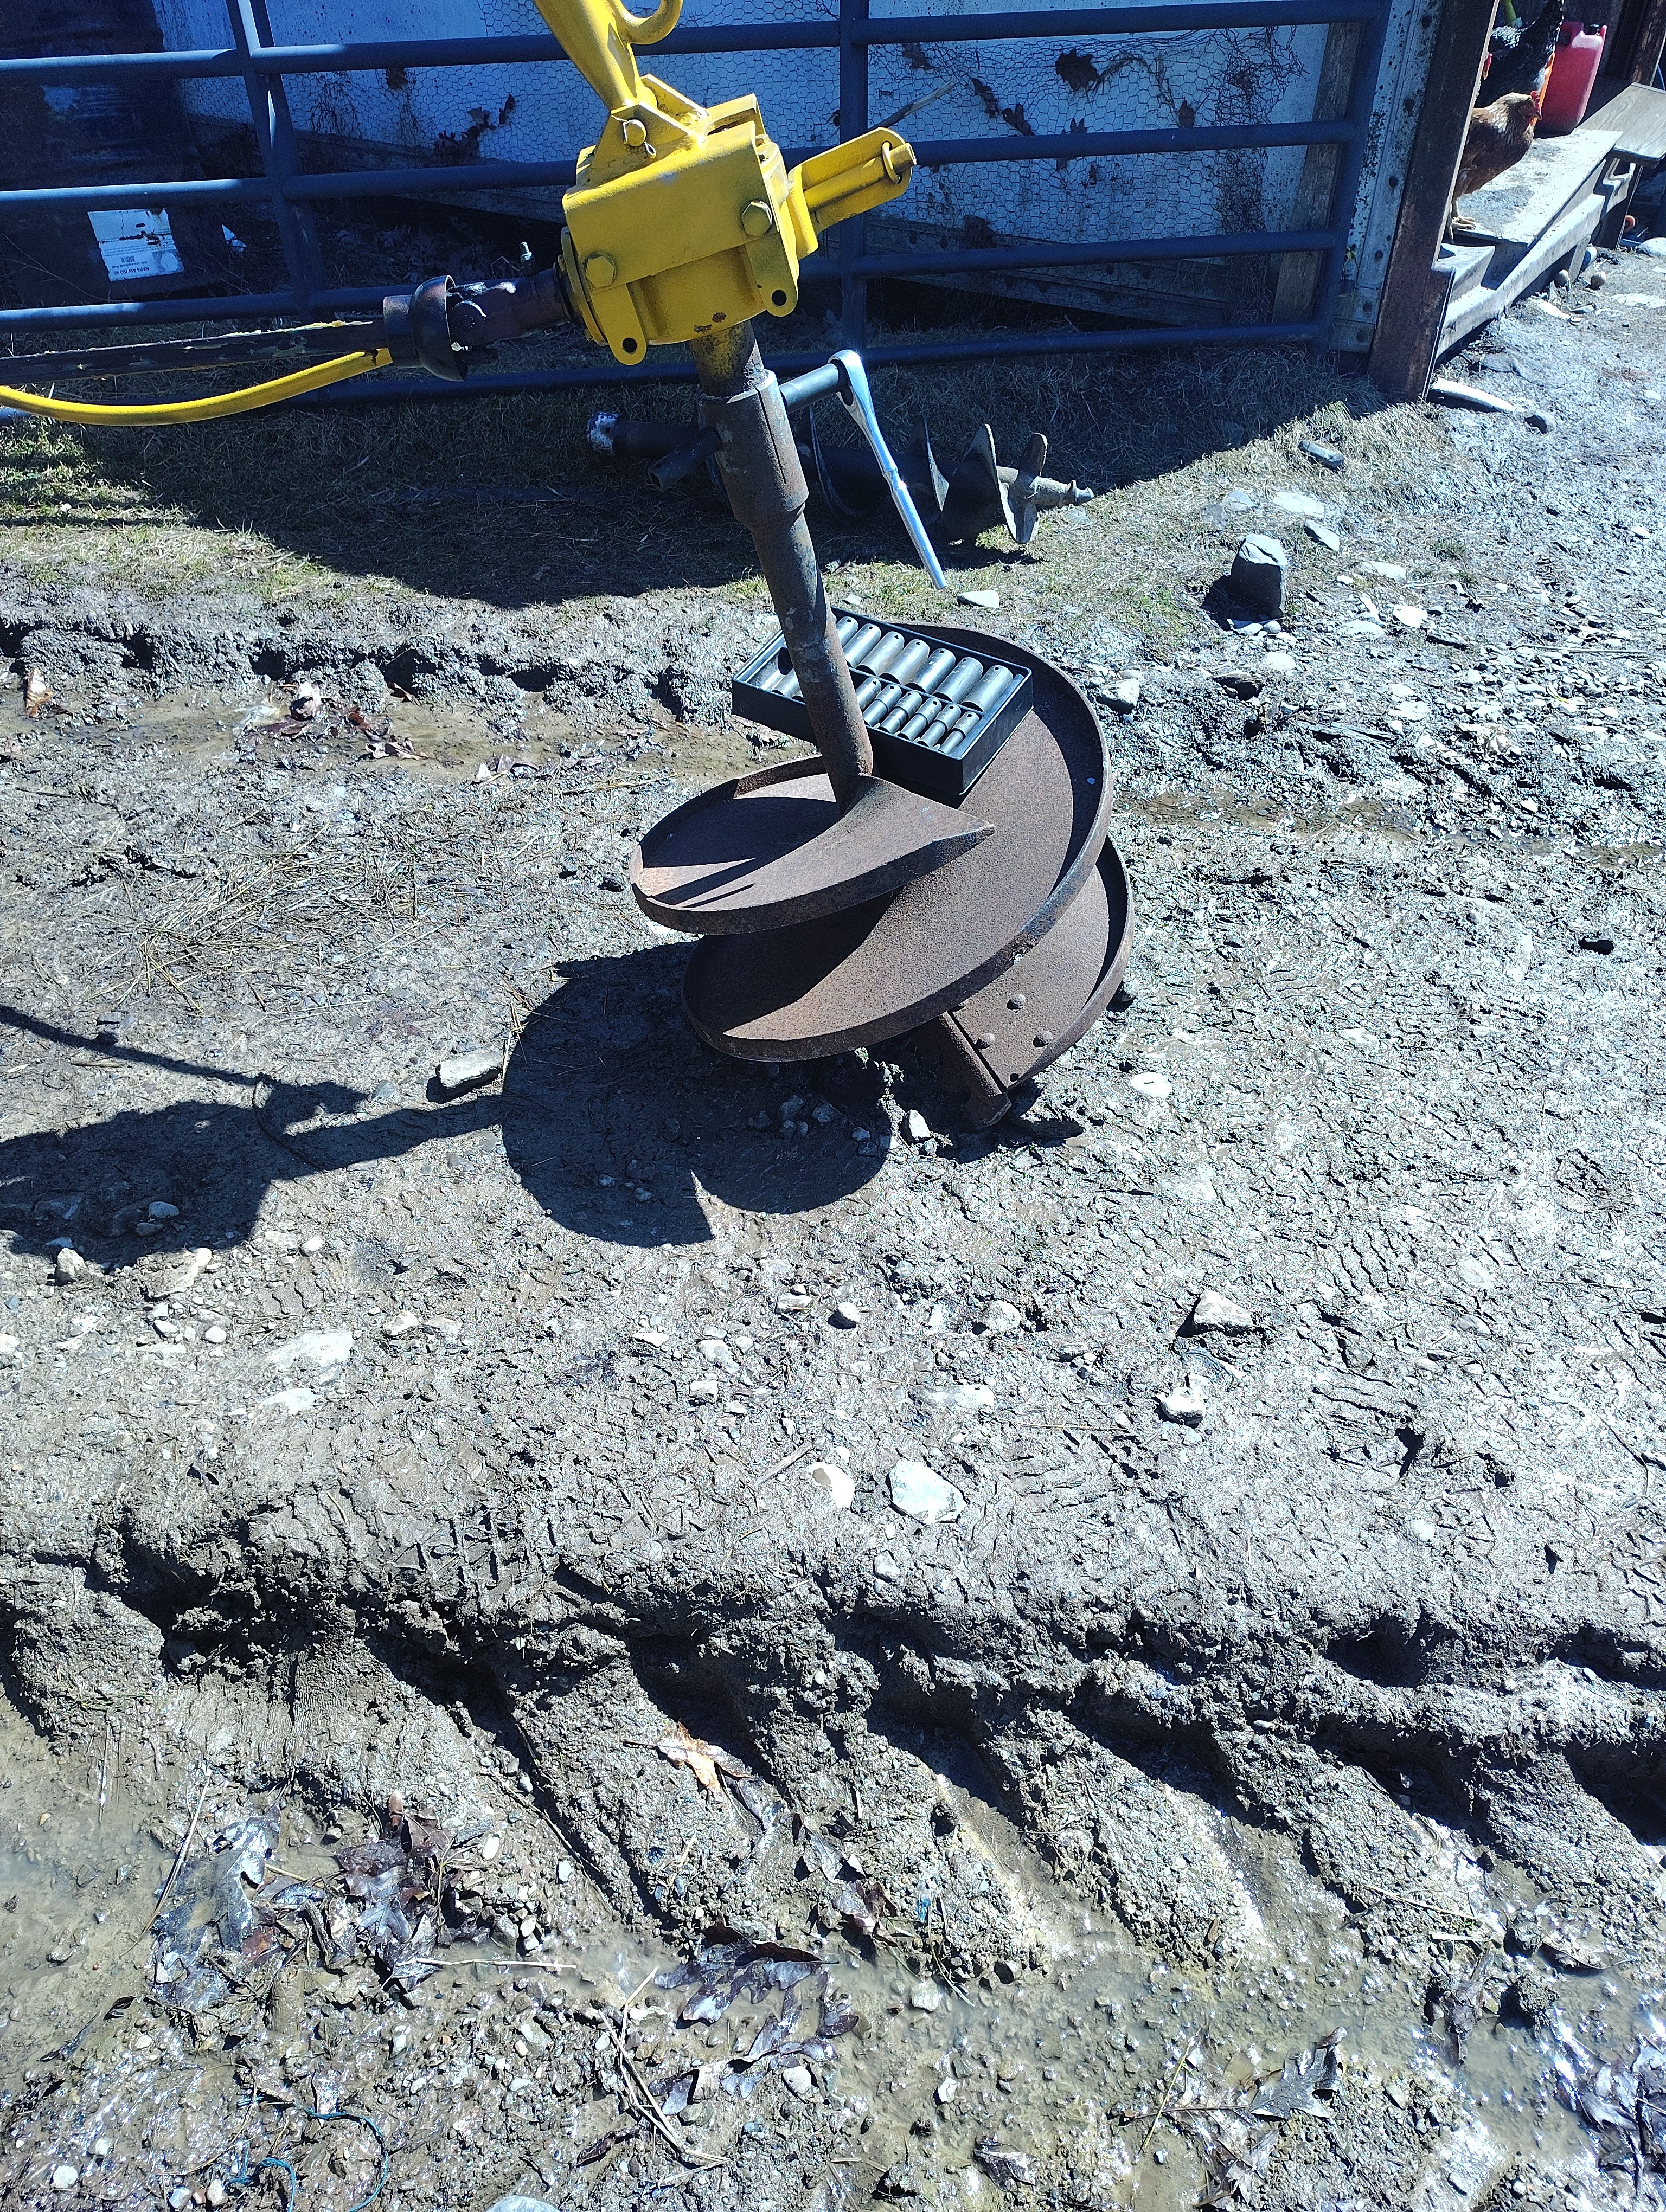
In the end, my Dad borrowed a cutting torch from a friend and superheated the bit. That finally broke the rust bond, and the bit was off in minutes. Guess we should have started with that. The new bit wasn’t too heavy, and we got it lifted into place with ease; I made sure to apply plenty of anti-seize to the shaft beforehand. After that, all we had to do was find a low-grade nut and bolt to function as a shear pin on the digger’s driveshaft. The seller had warned us not to use a grade 8 bolt for fear that it wouldn’t snap and protect the gearbox in the event the digger got stuck. We dug a test hole with the large bit and were pleased with the results.
Okay, Maybe Harder Than I Thought…
Before long, the day of delivery was upon us. Dave had assured me that the bushes could remain in the pots they came in for a time, but I was eager to get them in the ground. So, we had to pick a planting location. I finally settled on the upper field. The lower field had been a wet mess all spring, and the prospect of trying to plant there wasn’t appealing, let alone caring for the bushes afterward. Plus, I figured if the upper field got too dry, I could always water. The first thing that had to be done was to drop a tree at the base of the field. It wasn’t in the way for planting, but Dad was worried it might drop on the bushes if we had to cut it down later.
Dad cleared all the current open space on the farm himself over the past 15+ years, so he has all the relevant experience. The tree was on the ground and pushed out of the way in impressively short time. The next step was to mark out the holes. After consulting the forum lords, I had decided to space my bushes 6′ apart within a row, and 10′ apart between rows. Like the rest of the property, the field was on an incline. Because of this, we made our rows going across the hill instead of along it, to help prevent soil erosion when it rains. We used a 100′ measuring tape and whatever sticks we could find to measure out and mark the hole locations.
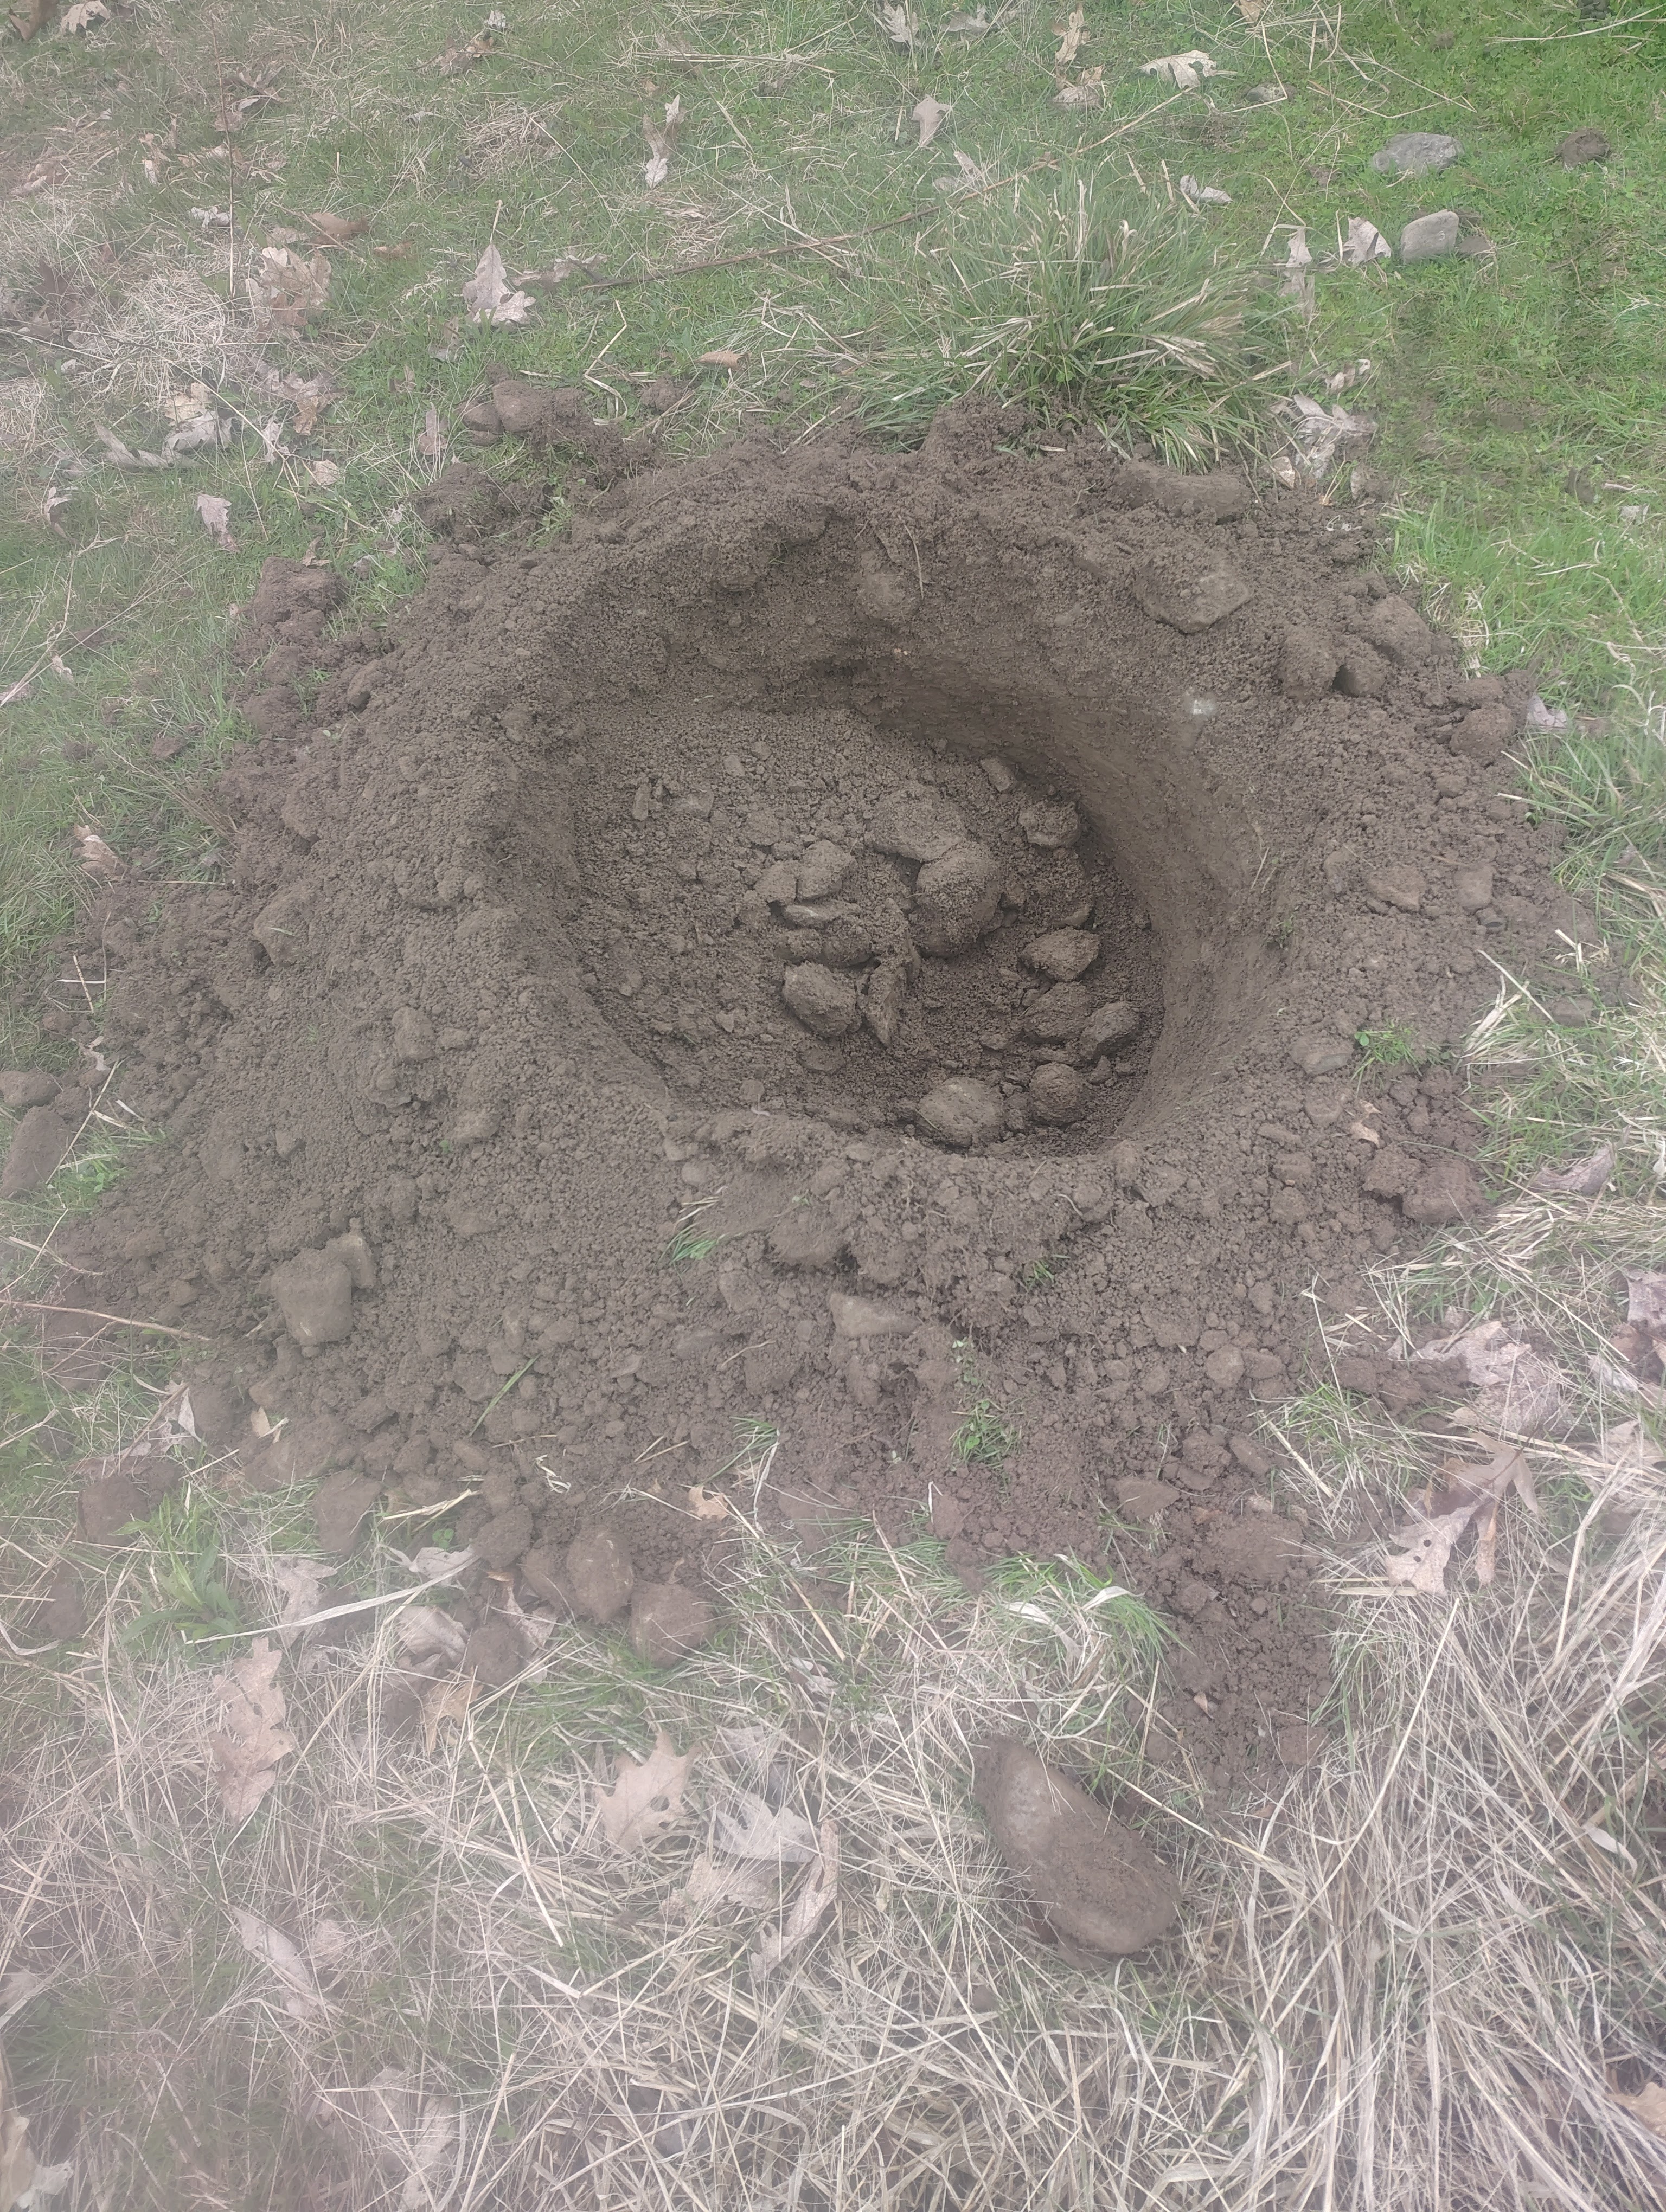
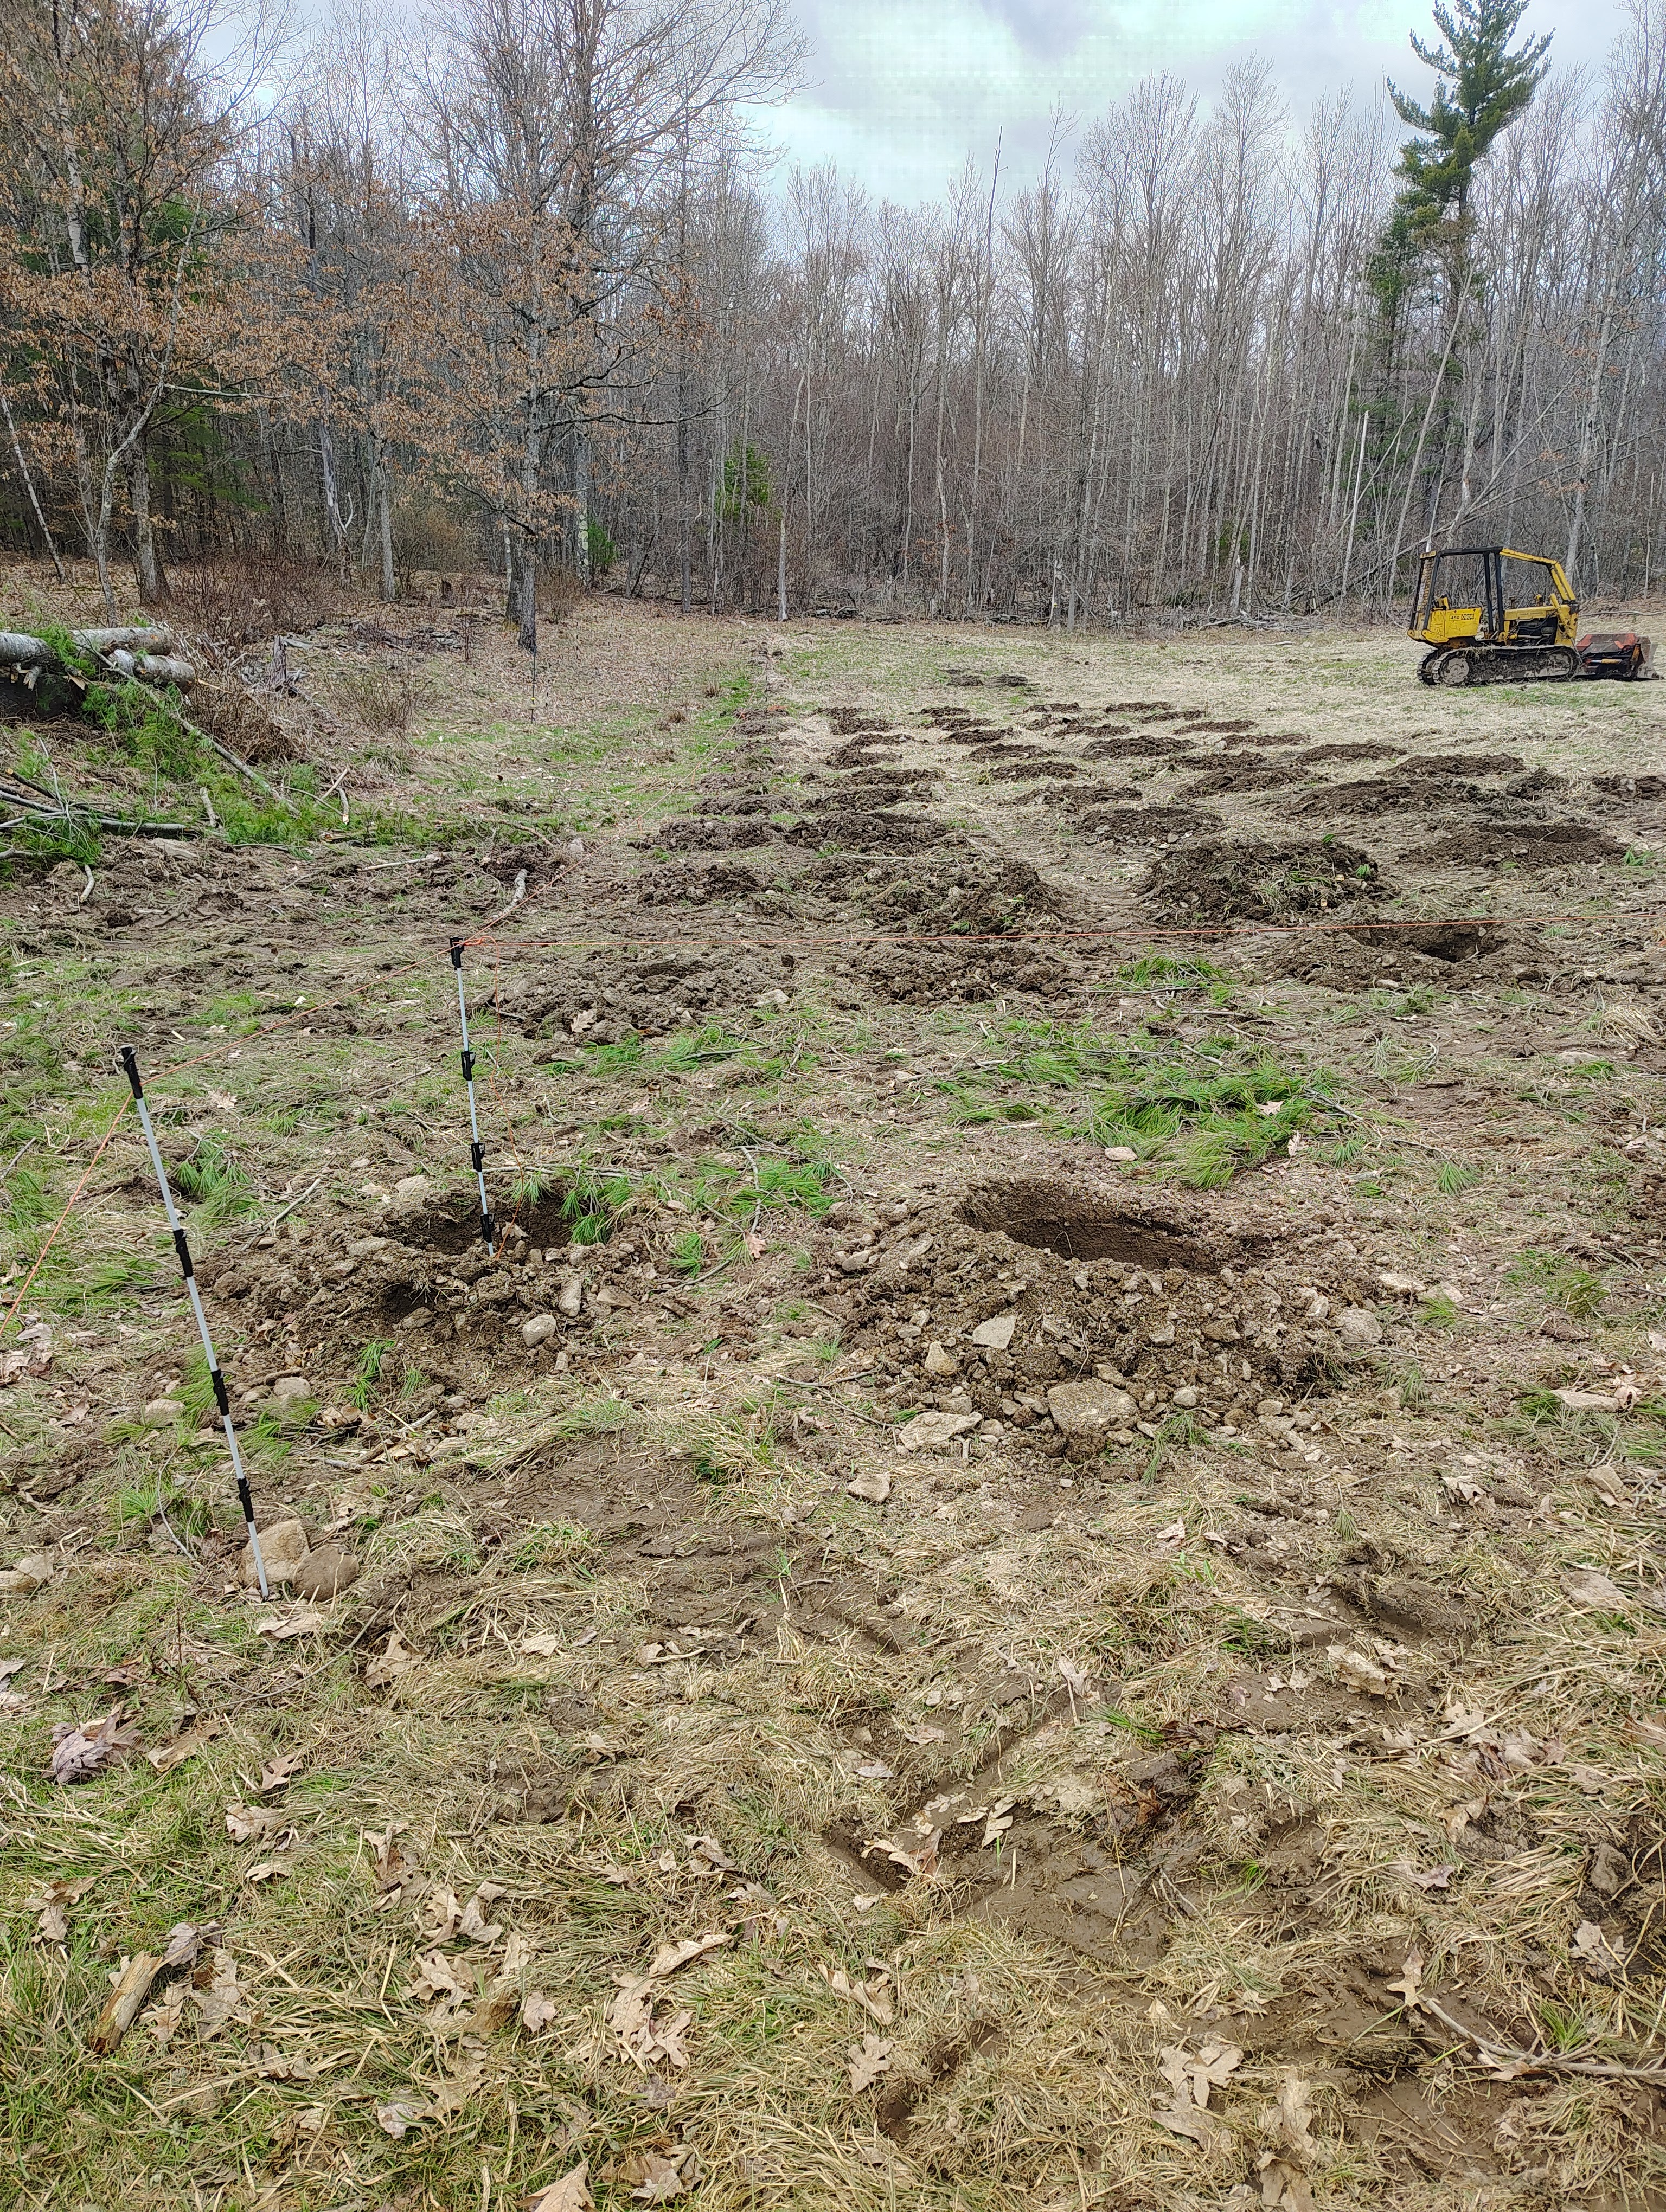
With our rows of hi-tech sticks in place, it was time to begin making holes. Things went okay at first. Dad operated the tractor while I followed and guided him to the right positions. The post hole digger did a fairly nice job of drilling through the clay soil; the resulting holes were everything a man could want from a hole in the ground. However, we quickly learned that the digger required patience, as it had to be raised and lowered several times to make one hole. Once or twice when Dad tried to drill a hole without stopping, the auger caught a rock and binded, snapping the shear pin.
That was just the beginning of our troubles as it turned out. At some point, the digger got started at a sideways angle and screwed itself into the ground at the same angle. The result was that the entire digger twisted slightly. We tried to continue, but the twist only got worse as time went on. Not to be thwarted, we pulled the New Holland alongside our bulldozer. We then hooked up a come-along to the digger at one end and to the dozer at the other end. Dad cranked on the come-along until the digger slowly but surely twisted back. We had to repeat this procedure at least once more before the day was out, but all 50 holes got dug.
Planting The Bushes
Dave arrived with my bushes sometime that afternoon. We loaded the bushes onto a small trailer and hauled them up to the field with our Ferguson T0-30. It was getting late by that point, but I wanted to at least get started on planting. For soil amendments, a mix of peat moss and organic matter was used in each hole to help with drainage. In particular, I used pine needles, leaves, and bark, all sourced from the farm. Initially, I tried to alternate between layers of organic matter, peat moss, and native soil. At some point, I got a little less picky about it and just tried to get the hole filled in. It seemed to shake out about the same either way. Funnily enough, the deposed dirt around each hole never seemed to be quite enough to fill the hole back in on its own.
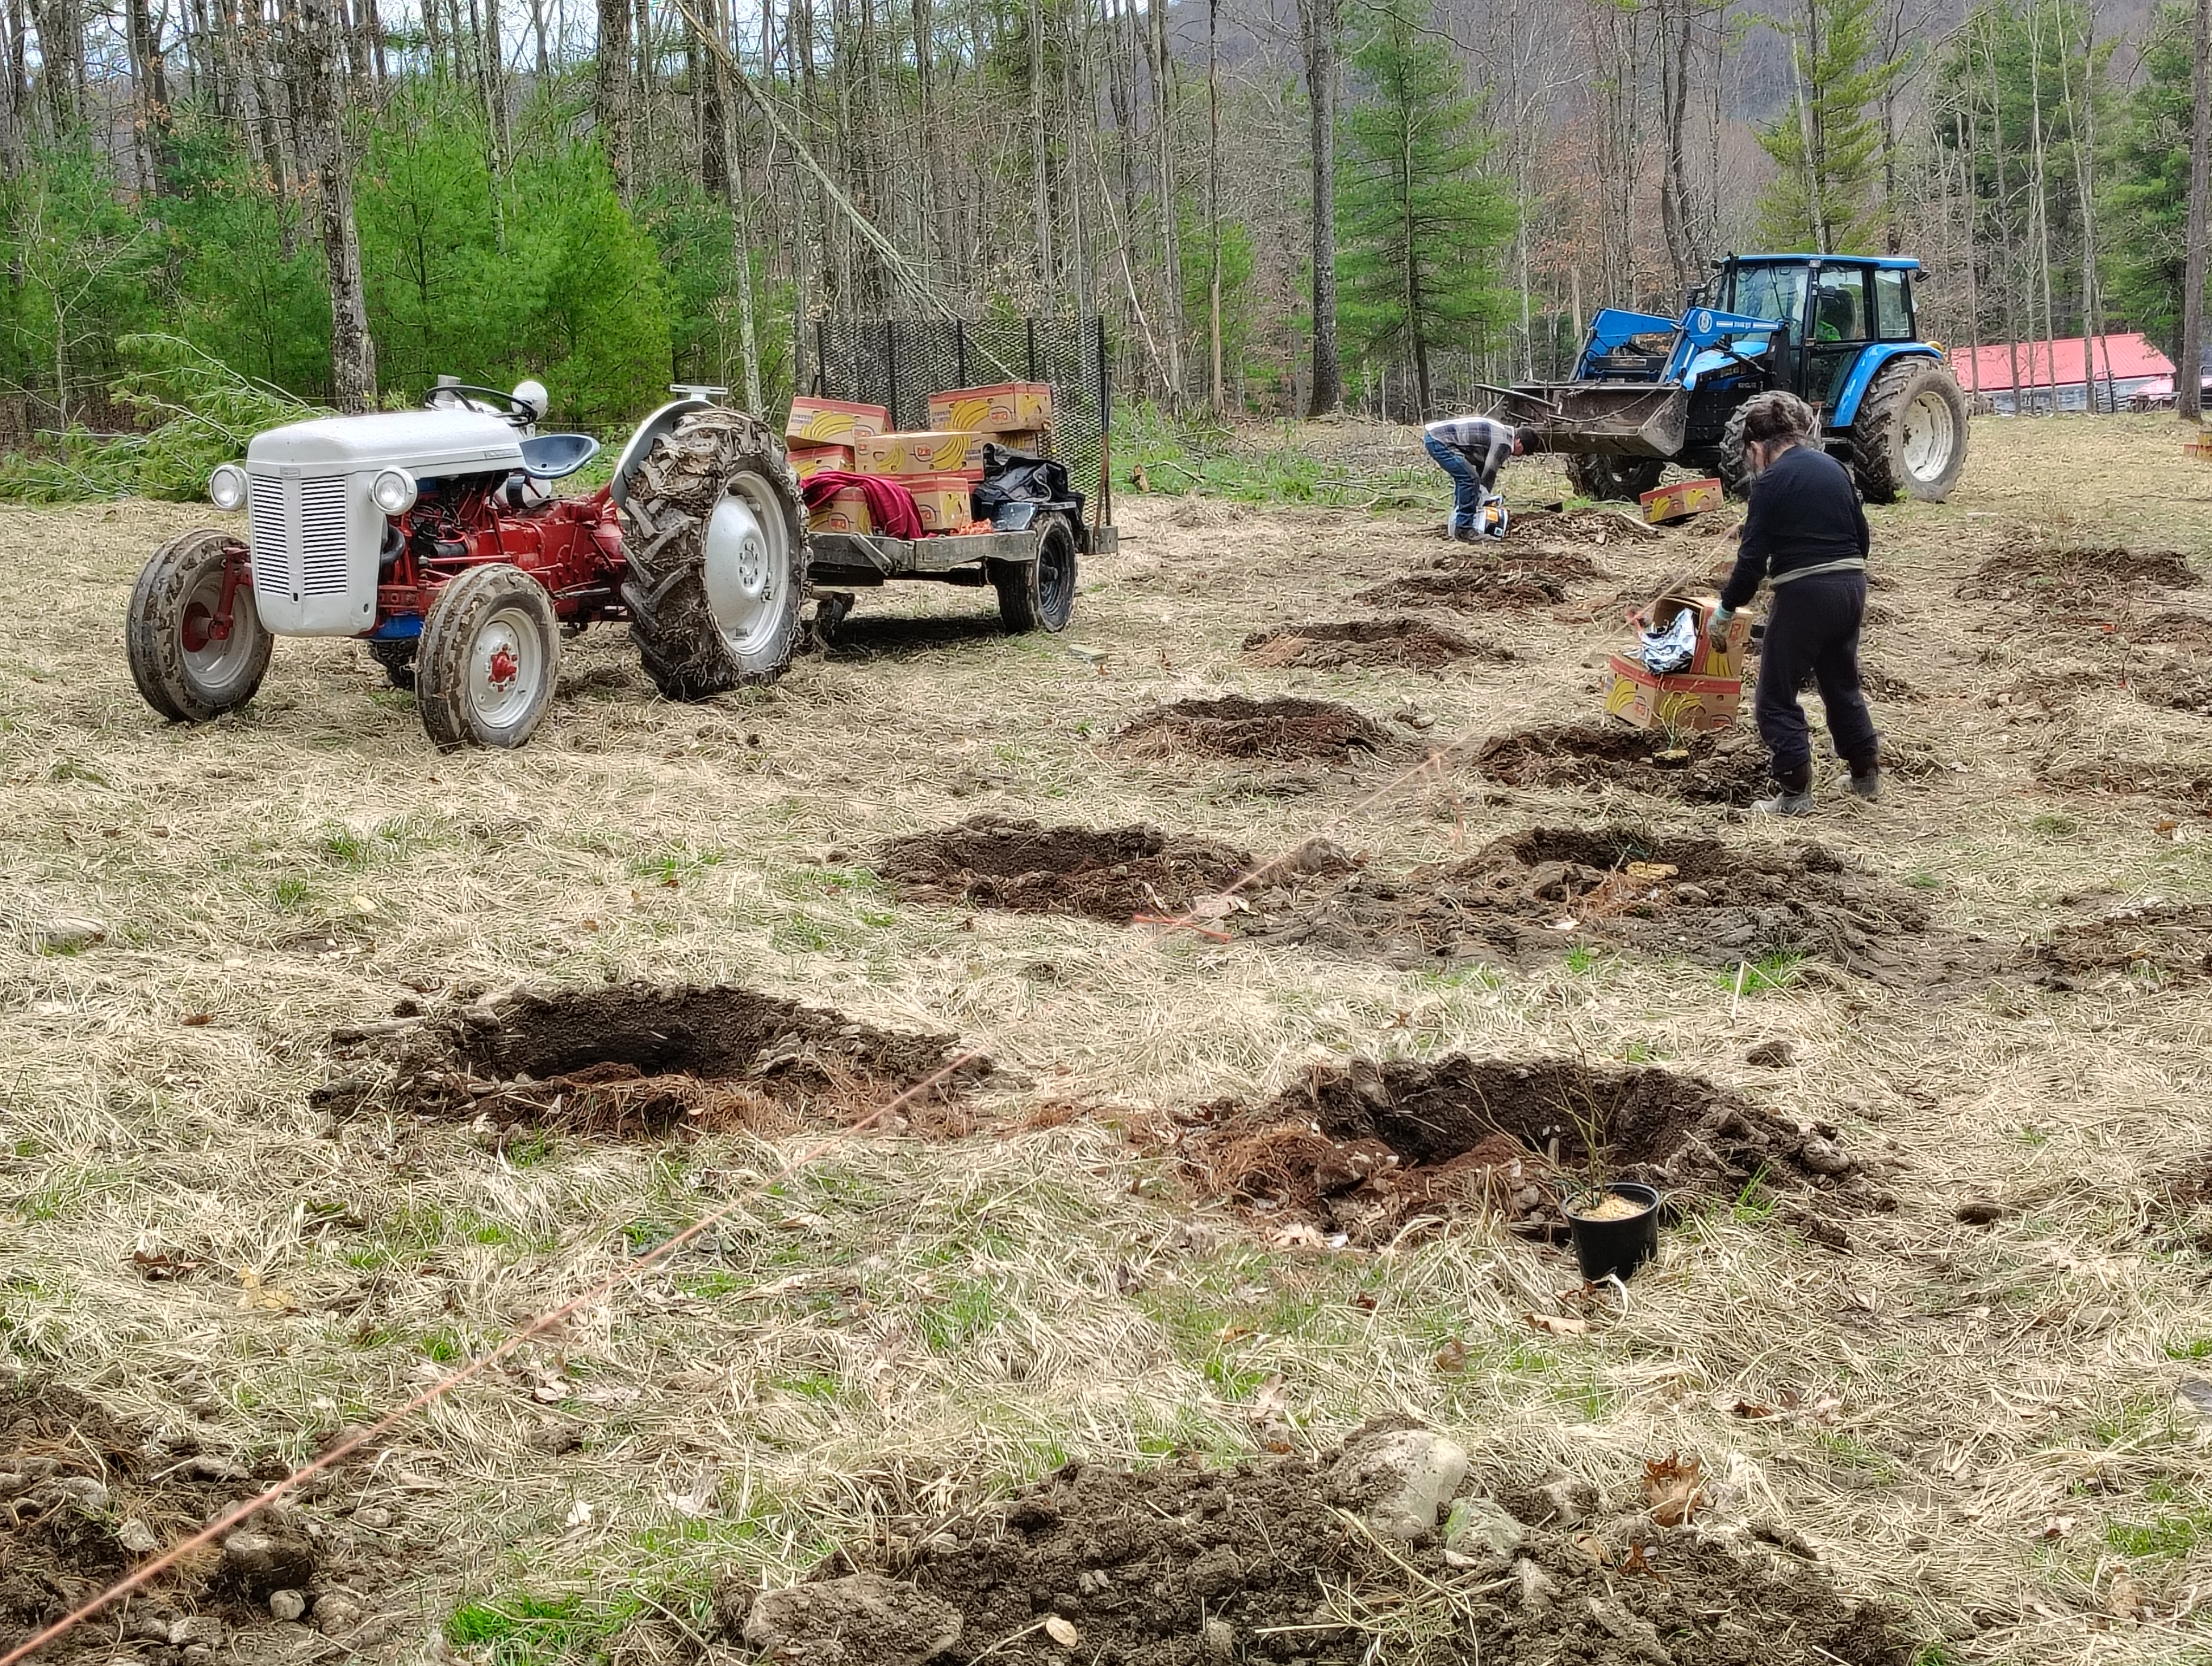
I got a few bushes in that first night and another half-dozen the next morning before reinforcements arrived. Both my parents pitched in, that really sped up the process. We generally had one person work ahead of the others, breaking up the sides and bottoms of the holes with a shovel and dumping in organic matter. The other two would follow along, pulling apart the bottoms of each root ball, transferring the bushes to the hole, and adding peat moss and dirt. To my surprise, we were all done by 1 o’clock. I had a triumphant lunch and cleaned up the empty pots, bags, and tools.
Next, I had to go about maintaining the bushes, but that will make for a whole other post.

Leave a comment